File Systems

NOTE: This is a gross simplification of a very complex matter.

I am going to give a brief run down on common file systems and what they do and why. Hang on, nerdy stuff ahead.

HFS+ Extended (Hierarchal File System +)

This one comes in a few varieties (journaled and non-journaled). Unless you know why to turn off journalling you always want it. HFS+ is used by Macs and certain other *nix based systems. You don’t need to understand that in full, just that if you are using ONLY macs in and are not going to need to use the drive in question on a PC for any reason ever, then use HFS+. It works the best with macs and is the least likely to experience corruption problems.

Bottom line: if you are only using a mac use HFS+.

FAT (File Allocation Table)

FAT is a unique format in several ways. First and foremost you are the most familiar with it but probably didn’t know you were. FAT is what is used by nearly all cell phones, GPS devices, cameras etc. The reason that these device all use FAT is that FAT is compatible with all PCs, macs, and most *nix operating systems. So now you are saying, why use anything else? The reason is a few fold. First and foremost FAT is most likely to corrupt as it is less advanced that the more modern file systems. Another reason is that you cannot store a file larger than 4GB on a FAT formatted device.

Bottom line: if you are using lots of different computers with lots of operating systems use FAT, but always safely remove devices (eject, unmount, safely remove, etc.)

NTFS (NT File System)

NTFS is more or less the windows equivalent to HFS, however it bares some interesting side effects. The drive can only be written to by a PC running some flavor of windows. However, the drive can be read by a mac. In practical application, if you have a PC that you do most of work on, but want to copy files FROM the PC drive to a mac you can do it. However, you cannot put files from the mac onto the PC drive (without file system extensions which I will cover later).

Bottom line: If you use only PCs and might read the data on a mac, use NTFS.
building and formatting a hard drive

In lieu of the article about backing up your data I figured that we would go over how to “build” a hard drive from pieces that one can buy on newegg.com or any other online/local computer parts retailer. In this article I will cover the following topics:

  1. choosing the parts
  2. assembling the drive
  3. formatting for your usage patter

Choosing the Parts:
There are a huge variety of options and parts that can be used to assemble an at home hard drive. There are a few terms that need to be understood before you can begin shopping and ordering.

The first thing to understand is the drive interfaces. External interfaces are easy to understand. The most common, and the most useful for the broadest range of users is USB. For mac users firewire is awesome, it has a sustained transfer rate instead of fluctuating like USB. The final interface that you will regularly see is eSATA, while eSATA is fast and reliable (think super fast), there are only a handful of devices capable of connecting to it. The majority of drives these days will have USB regardless of the primary interface.

Bottom Line on External Interface: if you have a mac with a firewire port, and money is not a huge issue buy this drive enclosure (it is for 2.5“ drives). If you are a PC user who really doesn’t care about eSATA speed, then buy the cheapest USB enclosure that has good reviews on newegg. If you are reading this thinking that I missed something then you understand more than I will cover here, and should go back to shopping.

Internal interfaces are a little more straight forward. Unless you have a reason not to, buy one that says SATA 3.0 Gb/s. If you have a reason not to then you know more than I will cover here.

Bottom Line on Internal Interface: Buy SATA 3.0 Gb/s.

The biggest factor that causes the majority of stress in choosing is undoubtedly which size of drive to get. I am going to break down pros and cons for each of the popular sizes below.

2.5” drives

Pros:

  • portable
  • light
  • no power cable (powered by the computer)
  • can be installed in a laptop or desktop

Cons:

  • limited storage space
  • increased cost / GB
  • slower seek speeds / dollar

3.5“ drives

Pros

  • cheaper / GB
  • larger capacity options
  • increased speeds / dollar

Cons

  • requires power cord
  • less portable
  • cannot be installed in notebook as a replacement

Assembling the Drive:

[flagallery gid=13 name=”Gallery”]

  1. make sure that your workspace is clean and clear
  2. ensure that you have the correct tools (generally a screwdriver)
  3. carefully insert the drive into the PCB board (most often a tray)
  4. carefully place the screws that mount the drive to the board. This prevents the drive from vibrating making noize and potentially damaging the drive over time.
  5. after the drive has been mounted to the tray, gently slide it into the outer enclosure.
  6. attach the rear plate.
  7. admire your nerdy handy work.

Formatting the Drive:

In OS X.

  1. attach the drive to the computer, and if the drive has a power switch turn it on.
  2. if presented with a prompt to ”initialize“ click initialize now and skip to step 3
  3. locate and launch disk utility (applications -> utilities -> disk utility) or (search in spotlight)
  4. locate the drive on the left column make sure that it is the same size and not one of your other drives.
  5. select the ”Partition“ tab.
  6. under ”Volume Scheme“ choose ”1 Partition“.
  7. select options at the bottom.
    • follow the directions under the options for the one that suits what you will be using the drive for. For most modern mac users GUID will work the best.
  8. under ”Volume Information“ select the file system that best suits what you need. If you are not sure see this article.
  9. name the drive under volume information.
  10. choose apply.
  11. sit back and relax while the partitioning and formatting takes place.

In XP

  1. attach the drive to the computer, and if the drive has a power switch turn it on.
  2. right click on the drive that appears under ”Hard Disk Drives“
  3. select ”Format…“
  4. choose a file system
  5. name the drive under volume label
  6. DO NOT choose quick format
  7. click start
  8. kick back and wait

If you have any questions just post up in the comments.

Basic Tomato Sauce

This is one of the Italian staples. You need to master this basic concept before you move on to the more advanced sauces and pasta dishes. The other beauty of this sauce is its broad appeal to guests and its low cost of preparation. Another advantage is that it can be made in as little as 45 minutes or left to cook for up to 8 hours. Think flexible.

Ingredients:

  • fresh garlic
  • can of crushed tomatos
  • 2 cans diced tomatos
  • olive oil
  • basil (dry or fresh)
  • oregano (dry or fresh)
  • salt
  • pepper
  • red wine
  • parmesan cheese
  • pasta of choice

Preparation:

  1. crush and mince fresh garlic
  2. saute in olive oil and wine
  3. add cans of tomatoes to garlic mixture
  4. coat top with basil, oregano, and dash of salt and pepper
  5. add splash of wine
  6. allow to simmer using cheese to adjust thickness
  7. boil water and prepare pasta al dente

Serving:
Plate and serve immediately. Serve with cheese and crusty bread or garlic bread if desired. Ensure if using a long

backing up your data

Backing up your data is one of the most important steps in in the modern photographic process. Digital actually allows for the making of multiple copies. I will focus on using a mac for specifics, but keep in mind that the basic concept applies across all platforms.

PUT YOUR DATA ON MORE THAN ONE DEVICE. IN MORE THAN ONE PLACE.

It is actually that simple. However you want to do it is fine. There are programs that copy your entire harddrive to an external drive automatically, there are programs that do it so that you can pull that backup out and stick it in your main computer if the main fails. I am going to outline my setup, as always, your milage may vary…

The main problem with ALL backups is that they WILL fail. Always, every single one, every single time. This is true of floppy discs, CDs, DVDs, Blu-Rays, hard disks, and flash devices.

Main Computer
My main machine is a MacBook Pro (MBP). Sure it is highly virus/hack/spyware/malware resistant, but it is not spilling a drink/dropping or getting hit by a bus proof, and it is most certainly not theft-proof. My MBP is running the latest and greatest snow leopard (10.6) and I am fortunate enough to have a plethora of hard drives at my disposal. The best way to back up your mac is through the built in Time Machine utility. It is super easy to setup and will backup every hour automatically, so long as the backup drive is available. It also makes rolling back to older files very easy. I recommend a larger hard drive than the one being backed up as it allows room for history as well as other files and is more future proof.

Additional Files
What if you have files that do not reside on the drive in your computer? So you have made the jump and have begun using an external hard drive. As your main computer gets bogged down with stuff you begin to move files and folders over to that other drive, which is commendable as you are freeing up space, which keeps your machine tidy and therefore faster and less buggy. Also, diversifying your data across more than one device is a way to decrease the odds that you will lose everything in a mechanical/software failure. The problem is multifaceted.

Not only will the drive fail at some point, most likely the most inconvenient time. It is also by its very nature relatively portable. This portability increases the likelihood of theft and loss incredibly. It also increases the likelihood of physical damage from drops, bumps, and abuse. The best thing to do is to be highly organized and make sure that the data on the drive is in more than one place.

Application of New Knowledge
There are endless combinations of backup schemes, however, I will outline a few simple options below.

  1. A Time Machine drive setup to mirror what is on your laptop and you have no other external drives. This is a good starting place and can help you to acclimate to the idea of backing up. I still highly recommend that you burn discs of important files and store them with a friend/family member to protect against fire/flood/theft.
  2. A Time Machine drive setup to mirror what is on your laptop and external drives that hold other information. The simplest way to execute this is to have 2 identical drives that are labeled something like Drive1 and Drive2. Make sure that they have the SAME folder structure and drag and drop files to both drives every time you move something to 1 and 2.

Here is a slightly more complex but more automated option.

  1. A Time Machine drive setup to mirror what is on your laptop and external drives that hold other information. The difference here is that you can actually use software to mirror one drive to another, sort of like Time Machine does. This allows for a more hands off approach and does not require you to carry 2 drives around all the time. I highly recommend carbon copy cloner by bombich software. It is relatively straightforward and has excellent help files.

This is the most expensive but easiest option.

  1. Purchase a Time Capsule device, follow the setup instructions and your machine will automatically backup whenever you join your wireless network. I still HIGHLY recommend the burning of discs of important files as well and storing them off-site.

What Should I Buy
Almost all major hard drive brands are good these days. I highly recommend Seagate and Western Digital. I also like LaCie drives, however, their warranty tends to be shorter. If you are on a tight budget and possess a basic ability to operate a small screw driver, then it is very easy to build your own drive from an enclosure and bare drive. A quick search online will reveal plenty of information on what you need. This generally yields a higher quality/lower cost and more useful drive later on down the road. I would suggest comparing prices between newegg.com and amazon.com. I also like to throw in that I highly discourage buying a used hard drive, as you have no idea what it has been through.

basic mac maintenance

Although we all think that our macs are perfect, truth be told, they aren’t. Here are some basic tips to make sure that your computer is running as well as it can.

  1. make sure that your desktop is not covered with items. OS X is based on Unix and there is some really complicated stuff behind why this slows down your computer, but long story short it does. Keep your desktop clean.
  2. ensure that there is at least 10% of your hard drive free. How do you check this?
    • ctrl + click on the hard drive on the desktop (most likely named Macintosh HD)
    • select get info
    • do some basic math and check the used vs capacity numbers to make sure they are within spec
  3. install any and all updates that are applicable. Select  –> Software Updates
  4. repair disk permissions by opening harddrive –> Applications –> Utilities –> Disk Utility
    • select your hard drive from the list at left and then select repair disk permissions under the first aid tab
  5. if things are really bad then you can select verify disk next to it and if it returns errors find your install disk and follow the instructions that are required to repair the hard drive from the disk.

Those are the first things that should always be checked in order to get a mac back in action. Anything beyond that will be addressed in a future post.

Using PhotoRec

First off I would like to thank CG Security for the amazing product, you have shown us that the best things available are provided with trust that donations will be made when possible, and please donate to this cause, as you will see a huge amount of work went into making this application function and on all platforms.

I will describe my technique for using photorec, which I have found to work quite well for all Nikon, Canon, Olympus and Pentax DSLRs, as well as iPods and computer hard drives. As always you proceed at your own risk. At the bottom of this post there will also be a link to the official step by step on the cgsecurity website. I recomend that you consult both if unsure.

The following settings and steps are based on recovering media from digital camera media. A macintosh was used however, the process is the same on all platforms.

  1. download photorec/testdisk from cg security at http://www.cgsecurity.org/wiki/TestDisk_Download
  2. unpack the download
  3. navigate to and execute the file named photorec
  4. Select the disk that is same size as the one that you are attempting to recover. Remove all unnecessary external disks and drives to facilitate the process.
  5. In the case of camera cards, ipods, and most computers you will select Intel from the list
  6. The next step is to select the valid partition table. In layman’s terms select FAT from the list unless it is unavailable, in which case select no partition.
  7. Choose other from the next stage
  8. choose whole from the next stage
  9. create a folder on your desktop named recover
  10. select desktop
  11. select recover
  12. strike the y key to begin recovery
  13. wait, be patient this is complicated stuff and can take some time.
  14. when the application is finished take a look in the recovered folder and if it was successful immediately copy/burn the data to another source before continuing.

For those who require visual aids I have made a massive step by step screenshot that can be found here:
www.accardophotography.com/wp-content/photos/stuff/photorec_use.jpg

There you go, you are all ready to hopefully never need to know how to use this, and if you are reading this line while recovering, best of luck!

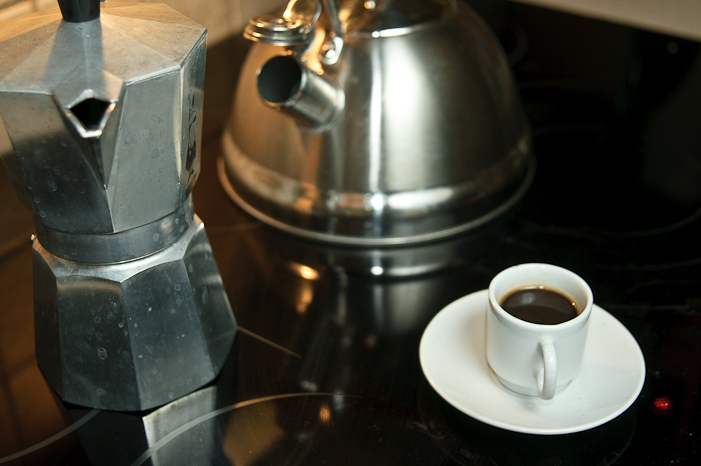
moka pot espresso

Step 1:

Start boiling your water. I prefer to pre boil the water so that the grounds spend less time on the heat. This is controversial so I suggest trying both and utilizing the one that works best for you.

Step 2:

Fill the bottom chamber with the now near boiling water. Fill to just below the valve or the fill line, whichever your pot has.

Step 3:

Drop in the ground holder and fill to level with coffee of your choice, I honestly really like Maxwell House Columbian and the el cheapo Wegman’s house brand coffee.

Step 4:

Carefully, Super carefully, screw the top portion onto the the bottom assembly. I say be careful to avoid burning ones self.

Step 5:

Put the pot on LOW. If you go too high the coffee will spray out of the top and worse yet taste really really lousy.

Step 6:

Drink.

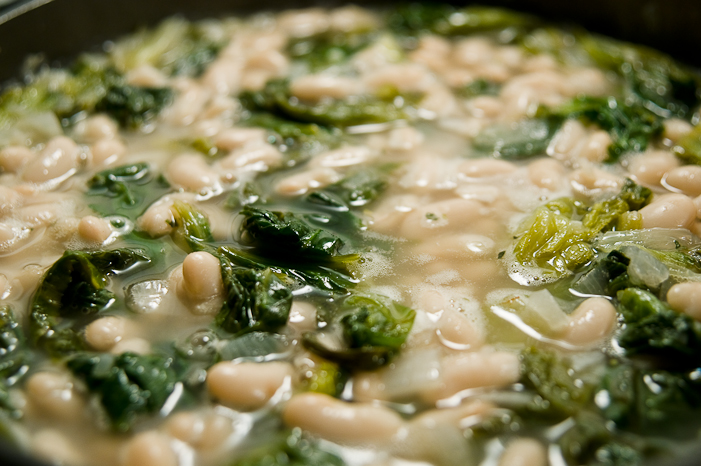
one pot greens and beans

There is little that warms up a cold night, or fills the comfort food need without being terrible for one, like a big bowl of greens and beans.

ingredients:

  • 2 or 3 shallots
  • 3 cloves of fresh garlic
  • olive oil
  • large head of escarole
  • 2 cans of canellini beans
  • chicken stock
  • water
  • white wine
  • basil
  • oregano
  • finely grated parmesan

preparation:

  1. lightly coat the bottom of the pot with olive oil
  2. finely chop and sauté the garlic and shallots together
  3. add the escarole and a good splash of wine, don’t worry about the water on the escarole from washing, it will help to make broth. Only use the leafy parts of the escarole, avoid the hard structural stem pieces.
  4. stir the greens and garlic combination together until the greens are tendered and a rich dark green
  5. add the thoroughly rinsed beans to the mix
  6. add water and stock to taste and texture
  7. add basil and oregano to taste

serve:
Ladle into warmed bowls and serve sprinkled generously with the parmesan. Best enjoyed with friends and family, and then the next day for lunch!

egg white(ish) omelet

This omelette is a bit of a cleaning out the fridge meal. Omelets are awesome for days when you don’t want to run to the store, and just want to eat something fast and delicious. The only problem is that omelets are quite high in saturated fat and cholesterol, things to avoid. Enter the egg white.

ingredients:

  • 1 smallish clove garlic
  • olive oil/canola oil
  • 1 whole egg
  • 3 egg whites
  • lowfat colby jack or cheddar
  • feta cheese
  • any thing else you like in an omelet

preparation:

  1. lightly drizzle oil into skillet
  2. sauté garlic and other items you desire into omelet (peppers, onions, meats)
  3. crack the whole egg into a bowl
  4. separate the egg whites and add to the other egg
  5. whisk eggs briskly and sprinkle a touch of cheddar or colby (this helps to bond the egg and adds a little more yellow color)
  6. add eggs to sauteed accompaniments, and allow to cook into a large thin cake
  7. once the eggs are cooked add the feta and any other fillers
  8. fold and serve

serve:
Serve on a plate with a cup of fresh coffee and dry wheat toast for a delicious breakfast, lunch, or dinner. I like mine with a good amount of hot sauce (Cholula is my favorite).

healthy boneless wings

Buffalo wings are a big time favorite, and it is easy to see why. Spicy, delicious and All-American. However, they are greasy, fatty, and incredibly messy. Enter the boneless wing, however, in restaurants they are expensive and deep fried. That is where these lighter, healthier wings come in.

ingredients:

  • 1 pound chicken tenders
  • canola oil
  • franks Red Hot Sauce
  • white vinegar
  • buttermilk
  • flour (any kind)
  • cornmeal
  • cayenne pepper
  • marie’s brand blue cheese
  • celery
  • carrots

preparation:

  1. Mix 3 Tbs Franks Red Hot, 3 Tbs white vinegar, 3 Tbs buttermilk (milk, we use skim, with a dash of vinegar)
  2. Pour above mixture over chicken tenders in plastic container or ziploc bag and let marinade in fridge for 20 minutes.
  3. Meanwhile, mix: 6 Tbs flour, 6 Tbs cornmeal in a pie plate for breading
  4. Heat large skillet with a coating of canola oil to frying temperature.
  5. Roll marinated chicken in the flour mix and add to pan
  6. Let the chicken fry and allow the breading to setup before moving and flipping
  7. Sprinkle cayenne over the chicken while it is breading
  8. Mix vinegar and Red Hot in a 1:1 ratio and drizzle over finished chicken tenders
  9. Serve

serve:
Serve on a large plate with dishes of Marie’s blue cheese and celery sticks and carrot sticks.

joey's alla olio

Alla Olio is perhaps one of the greatest things that you can have in your Italian food toolbox. The first reason it is great, is that it makes a great starting place for other sauces. The second reason is that any self respecting cook can whip up a full meal using alla olio with what they have in about 15 minutes. The third reason is it will really impress guests. Be warned, this recipe has a serious case of a little bit of this, a little bit of that, so, I recommend that you make privately the first time!

ingredients:

  • fresh garlic
  • olive oil
  • basil (fresh or dry)
  • white wine
  • butter
  • parmesan or romano
  • pasta (linguine, fettucini, linguini fini, farfalle)

preparation:

  1. Start boiling your water for the pasta first
  2. Wait around for a few minutes while the water starts to boil
  3. Slice or crush some garlic (about 3 medium cloves)
  4. Heat olive oil and white wine in pan
  5. add garlic
  6. add basil and any other spices
  7. sprinkle conservatively with parmesan while stirring
  8. once garlic is tender and slightly golden pour over pasta
  9. toss
  10. serve

serve:
Serve on warmed plates or pasta bowls with nice cool water or a nice wine. Ensure that if using a long thin pasta that a spoon is provided for twirling. Sprinkle liberally with parmesan. A crusty piece of lightly toasted Italian bread goes great as well.

Mangi

making weak coffee (on purpose)

As you have read here there are a lot of ways to make a good cup of strong, espresso-like coffee. There are also ways for those who do not like strong coffee to enjoy a cup. The most common method of brewing coffee here in the USA is the drip pot. Most of us are familiar with them. However, what happens is that drip coffee, when made with the correct ratio of coffee to water can be too strong for many drinkers.

The Bad

The most common way to weaken coffee is to just use less coffee grounds. While this does indeed make weaker coffee it also makes bitter coffee, this is bad.

The Good

The less common way to make good weak coffee is to make it out of the recomended strength and then add water to taste. An example of this would be to use the recommended amount of coffee for 8 cups of coffee and then add 4 cups worth of water to the pot prior to brewing. Adding the water first allows the water to warm on the burner and then also mix while the coffee drips out.

organic orzo

Chicken Orzo is my ultimate comfort food. Some people have mashed potatoes, macaroni and cheese, and pot roast. Not me, hand me a glass of wine with a nice steaming bowl of chicken orzo and I am one happy guy. Heres how to make it, as with most of my recipes it is a little bit of this little bit of that, but it is really easy to correct and as my family jokes, “season to taste.” Just keep in mind; don’t plan on going anywhere after this meal for two reasons. Primarily, you’ve now been drinking and that is bad. Secondly, the orzo is going to hit your stomach like you have never seen before, and you are going to curl up and go to sleep.

ingredients:

  • 6 large cloves fresh garlic
  • olive oil
  • basil (fresh or dry)
  • oregano (fresh or dry)
  • white wine
  • parmesan or romano cheese
  • 1 lb. orzo pasta
  • 6 organic, free range chicken drumsticks
  • 1 cooking onion
  • 1 large shallot
  • 2 Tbsp. better than bouillon organic chicken
  • 6 c. pure water (spring or filtered)
  • whole organic carrots
  • dash cayenne pepper
  • black pepper

preparation:

  1. finely chop onion, garlic, and shallot
  2. saute onion, garlic, shallot, basil, and oregano in oil and wine (in the soup pot) until tender
  3. in a separate pot boil water, once boiling add 2 Tbsp. of better than bouillon.
  4. add drumsticks (whole) to onion slurry and continue cooking, adding wine if necessary, allow to cook while stock forms
  5. when stock is at a rolling boil and completely dissolved add to chicken and onions
  6. add 3 diced carrots to pot
  7. add dash cayenne pepper, dash black pepper, basil and oregano to taste
  8. allow pot to simmer covered for at least 1 full hour (2 is better)
  9. remove chicken from pot and separate meat from bone and skin, re-add meat
  10. 20 minutes before desired serving time add orzo
  11. cook covered for 15 minutes, uncovering for last 5
  12. remove from heat and let stand covered until serving

serve:
Ladle into shallow bowls and top heartily with parmesan. Goes great with almost any wine (I enjoy with merlot). Pop in a favorite movie, prop up your feet and…

Mangi.

reheat:
Put desired amount into microwave/oven-safe plate. Microwave for 1 minute on high to loosen. Bake at 325° for 15 minutes uncovered for a delicious lunch.

orangeade

This one is pretty simple, and most people will find that it is actually quite good:

ingredients:

  • 100% orange juice (not from concentrate, pulp level of your choice)
  • pure water
  • vanilla extract (optional and expensive)
  • ice

preparation:

  1. ice
  2. mix equal parts juice and water
  3. add dash of vanilla extract
  4. serve

about:
The idea here is to create a sweet and refreshing orange beverage that is similar to a lemonade. The advantage here is that there is no inordinate amount of sugar added and you get the vitamins of juice. Also, it works great for those who have a sensitive stomach like me!

cheap popcorn

What is better than fresh movie theatre popcorn, not that waxy junk that comes in bags loaded with chemicals that most megatheatres have. Then along came microwave popcorn, great! Well maybe not that great, it is really expensive, and yet worse, it can actually be bad for you. Lets be honest though, paying close to 5 dollars for 6 bags of popcorn isn’t that bad, but what if I told you you could buy an insane amount of really cheap, healthier, that would tast even fresher? Well here it is…

Buy popcorn, the stuff in the bag on the bottom shelf that is 99 cents for 2 pounds. Drizzle a pan with a lid with cooking oil and throw in about 3 Tbsp. of kernels. Throw on medium high and cover and wait. Then, POP!

meatballs

ingredients:


meatballs

  • 1 lb. lean ground beef
  • 1/2 c. Italian bread crumbs
  • 1/3 c. water (more or less)
  • 1/4 c. grated parmesan cheese
  • 1/2 an onion
  • 4 large cloves fresh garlic (chopped)
  • 1 egg and 1 egg white
  • black pepper

sauce

  • 2 large cans crushed tomatoes
  • 1 can diced tomatoes
  • 6 cloves fresh garlic
  • dried or fresh basil
  • dried or fresh oregano
  • olive oil
  • parmesan

preparation:

meatballs:

Mix all ingredients together. Don’t add all of the water at one time. Mixture should be moist but not so that the meatballs fall apart.

Shape meatballs to desired size and place on a broiler pan (I wet my hands before shaping each meatball and it helps make a nice meatball.) Broil until outside is slightly brown on one side and then turn and broil the other side.

sauce:

Add the crushed tomatoes to the skillet with the meatballs. Simmer uncovered for 15-20 minutes until proper thickness is achieved. Add scant olive oil for flavor and thickness. Add basil (add fresh basil in prior to simmering, add dried at the end). Dust top of meatballs and sauce with fresh parmesan and serve.

Based on http://southernfood.about.com/od/meatballs/r/blbb628.htm

black magic cake

This is the cake that I grew up with as a child. Birthdays, graduations, mother’s and father’s day et al. A nice deep dark rich chocolate cake with a simple and delicious peanut butter frosting. mmmm.

Ingredients:

Cake Batter

  • 1 3/4 c. flour
  • 2 c. sugar
  • 3/4 c. cocoa
  • 2 tsp. baking soda
  • 1 tsp. salt
  • 2 eggs
  • 1 c. strong coffee
  • 1 c. buttermilk
  • 1/2 c. vegetable oil
  • 1 tsp. vanilla

Frosting

  • creamy peanut butter
  • +/- 1lb confectioners sugar
  • milk

Preparation:

Cake

  1. Mix cake batter ingredients for 2 minutes at medium speed
  2. Pour in greased and floured pan
  3. Bake 35-40 at 350°

Frosting

  1. Mix peanut butter, sugar and splash of milk
  2. (This part is all about experimentation, I recommend getting two boxes of sugar in order to practice, once you get the hang of it it is really quite easy)

Putting it Together:

  1. Let the cake cool for at least an hour uncovered
  2. Gently spread frosting evenly over cake
  3. Enjoy

grandma's chicken

This is one of my all time favorite family recipes and once you make it you will see why. It is a light yet hearty (if that is possible) chicken and pasta dish that is just the best, and it is really quite easy to make. Historically it has been a little bit of this little bit of that recipe so you will have to bare with me.

ingredients:

  • chicken with skin and bones (drumsticks, legs, breasts)
  • small jar of manzilla olives (pimento stuffed)
  • olive oil
  • small spanish onion
  • small bunch celery
  • green pepper
  • basil
  • oregano
  • parsley
  • garlic
  • red wine
  • medium shallot
  • capellini (angel hair)
  • parmesan cheese

preparation:

  1. preheat oven to 350
  2. chop olives, pepper, 3 stalks celery, garlic, onion, and shallot in processor
  3. add olive oil to blend
  4. cover chicken with blend
  5. pour a hearty amount of wine over mixture in dish
  6. cover
  7. bake at 350 for 2 hours and then lower to 250
  8. prepare capellini and cover with sauce from chicken
  9. serve

serve:
place a huge bowl of pasta with a tray of chicken on table. Sprinkle with parmesan. Accompanied well by both red and white wines.

Mangi

cf ipod

I now have a CF iPod, and it is awesome.  Fast, low power consumption and it cost me a cool 3 bucks for the adapter and a cf card I had laying around.  Until I can get a larger card it is stuck at 4GB, but to be honest, that is fine for now.  Surprisingly there was nothing wrong with the abused 5 year old hard drive, but it was surely coming soon.  Also, my brother has a toasted drive (I think) in his, so this was a proof of concept.  There are a few tutorials online, but if someone needs one I will tear in and make one.

Who rides the bus?

Prior to college I always wondered how people who relied on public transportation survived. However, credit goes to modern public transportation services and their providing service to those who rely on it. Technology has made it possible to look up departure/arrival times on the fly, as well as track the current location of the bus you need via gps so you can see if itnis late or early. I am currently riding the V route in state college after scoping out all the needed info with the CATA app for my iPhone. Awesome.

Pairing Your Batteries

Just a quick note about my apparent obsession with rechargeable batteries.  I wanted to talk about pairing up your NIMH batteries.  Science junk aside, NIMH like to work in sets of evenly worn and charged cells.  Alkaline batteries were much the same, however, since they got tossed at the end of their use, it wasn’t as big of a deal.  However, when you are working with eneloops rated at 1000 charge cycles, killing out that $11 set of batteries probably isn’t the best idea.  I just put a piece of masking tape around the battery and mark it with a unique name for the set, and an auxiliary number that marks the cell.  For instance as previously mentioned I use 8 AA eneloops in my D300.  I have marked them as MB1 and MB2 (the grip is the MBD-10) and then each cell is numbered as 1-8.  The individual numbers allow me to trace weakening cells to one problem cell and the larger set can be replaced with a new set while the other set is broken down to fuel remotes and other single and dual cell devices.

Entertainment Center

My iPhone has officially changed the way that I use my entertainment center forever.  I had an old dell running a bloated and malware infested copy of windows XP, sitting in a closet, collecting dust.  To be honest, for quite some time, I think that was the best place for it.  Then, I was lent an LCD TV by my mother (we can’t all be that lucky can we!).  This prompted me to build a Home Theater PC (HTPC).  Well, let’s say that I am cheap, and just couldn’t commit to any hardware until I ran a trial.  That trial was the Dell.  I figured that I would load it up with home theater software and it would run really slowly and perform miserably.  I was wrong.  With no malware and bloat on the machine, running nothing but airfoil speakers, vlc, tightVNC, and boxee, the old black and grey beast flies.  It is a P4 3.2 with 1Gb of RAM.  The machine has integrated 5.1 analog output and DVI.  All I can say is that it was not a joy to control, and my living room looked terrible with the wires running everywhere.  An old USB Bluetooth dongle made life without wires nice, and the Apple bluetooth keyboard and mouse look slick to boot.  But, when laying on the couch, enjoying a beer, nothing is worse than fumbling with a mouse and keyboard.

Then comes the iPhone.

First of all, let me say that by now we have all heard about the iPhone.  However, something that has blown me away has been the ability to use it as a remote control.  Sadly, it doesn’t control my TV, but when using a computer and dedicated receiver there is very little that needs to be frequently controlled.  The vlc remote works as advertised and, with the free version, allows for basic control of the application (pause, volume, skip).  The more exiting app is the boxee remote.  It is free, as is boxee, and allows you to control boxee with either gestures or hard buttons.

All I have to say is check out the coffee table, and then kick back and enjoy some media.

MacBook Pro Firmware 1.8

I know, I know, I know…

Another Mac fan talking about useless little mac things.  Well, I didn’t go over the Java update that just came out, oh wait, I just did.  All of that stuff aside, this update is actually a big one, at least for users of the late 2008 unibody macbook pros.

If you are familiar with the sound of a macbook booting or waking from sleep you have heard the crunching sound.  It personally reminds me of a small woodland creature, say a chipmunk, going through a blender.  It was really quite aweful and made no sense, it was sort of like the computer was checking to see if the drive was still there on wake.

However, with 1.8, it is gone forever.

Go update your macbooks now!

Respect

Respect for religion must be reestablished.

Public debt should be reduced.

The arrogance of public officials must be curtailed.

Assistance to foreign lands must be stopped or we shall bankrupt ourselves.

The people should be forced to work and not depend on government for subsistence.

– Cicero, 60 B.C.

Google Chrome (Mac) Review

I didn’t think that I would ever even download Chrome.  I feel like Google is becoming a tad invasive.  They have branched into operating systems, browsers, email, and all sorts of things.  I worry that they are mining data and breeching privacy expectations.  All of that garbage aside, why not try it out.  On my machine I currently bounce between the following browsers:

These browsers all have their own advantages and disadvantages, but to put it simply.  Safari is my favorite on the Mac, it is fast, follows good standards, and relatively stable.  Camino is rock solid, mildly extensible and open (it uses the same engine as Firefox).  Firefox is open, really popular and highly customizable, but quite slow and not Mac-like.  Then we have Chrome.  Read on.

Chrome is not super OS X like.  It seems like it would fit in better in a windows environement where everything looks different and that is ok.  Listen up Google, it isn’t ok on the Mac.  The menubar is too thick, and the tabs are bizarre.  I do like that the GUI takes up less space on the screen because the tabs are upward into the bar, but if they were less white, a shade totally unused in recent versions of OS X, it would be a lot nicer and unified.  Bar is also not Cocoa or customizable, which is a big downer.  For instance, I rarely use a bookmark button, and have actually never used a home button, yet cannot remove them in Chrome.

Chrome gets points for using keychain, and also for being wicked fast.  In fact, let me reiterate.

Chrome is wicked fast.

Another interesting innovation is the popup status bar at the bottom of the window.  When hovering over a link the lower left has a popup that tells you where you will be going, which is nice, the internet is a dangerous place.  I am still unsure of how I feel about the combo bar at the top.  It is both an address bar and a search bar.  The search bar scores Google some massive points in my book.  They allow you to choose your search engine.  I repeat, the search giant Google allows you to choose your own search engine.  You get to choose between Google, Yahoo, and Bing.  Good work.

Also, for the web designers out there, Chrome uses WebKit and all of its coolness.  It appears that you get support for color profiles in image files (awesome) and that you also get the really nice inspect element window on command.  Sadly, there is not develop option like in Safari, which I use to prevent image based ads and such.

The final blow to Chrome is that there is currently no provision to block the ever invasive flash.  It has become obvious to me recently that while flash has its place, it is really really slow.  I mean, when playing certain video files and games online I am maxing out a Core 2 Duo with 4GB of RAM.  That is really not ok, and should not happen.

With all of that said, I actually like the application overall and am going to play around with it for a little bit.

EDIT:  Chrome is now basically useless in my life.  It took it all of 15 minutes.  It does not support SilverLight, therefore no netflix streaming.  Well Chrome, it was nice knowing you.

the coffee basics

In a society revolving at whirlwind speed we seem to all gather on our last remaining performance enhancing drug: caffeine.  Sadly, it has come to gas station coffee; the equivailant to a junkies dirty needle.  For those looking to save a buck and make it at home you can be rewarded very handsomely.  Before you run out and buy the uber-mega-buck grinders and espresso machines you need to learn the basics.

  1. before doing anything else, check your water quality if you wouldn’t drink it as it came out of the faucet, you shouldn’t use it for coffee.  Also remember to use cold water, as it picks up less junk from pipes and all.
  2. make sure your coffee is fresh, and equally importantly, a roast you actually like.  For years I was convinced that I loved dark roast coffee, when in reality I actually liked the taste of properly brewed light roast coffee more, it was just that all of the properly brewed coffee I had ever experienced was dark roasted and vice versa.
  3. Take a little time to learn your machines and actually enjoy making the coffee.  Have some friends over and kick back with coffee and just talk.
  4. Make it fun!  Buy some old teacups at a thrift store and go classy, or get a giant thick mug to keep it warm while you work.  Don’t let people pressure you and enjoy the drink the way you like it.

The final tip that actually inspired this whole tip was to remember to warm your cups first.  I let mine sit filled with scalding hot water while i brew the coffee so that when i am ready to start sipping it is nice and hot.

Maha MH800s Review

My previous post was about how AA batteries have taken over my life.  The 800s charges NiMH & NiCd batteries (not that anyone used NiCd anymore).  It reconditions and deep charges the batteries.  In addition each battery is charged on an independent channel, so you can charge multiple sets of batteries at varying levels of charge, and they will all be optimally charged.  I use this in conjunction with my MB-D10 and well, it just works.  I use 8 eneloops with 8 backup eneloops, I have never had to dip into the backups, and I shoot a lot.  There is also a small LCD screen on the front of charging unit that shows the status of the charge.  No more guessing whether red is good or blinking green means charging.

A(A) Rechargeable Existence

When I bought my MB-D10 battery grip for my D300 I opted to go for the AA option, which uses 8 rechargeable NiMH batteries.  Then I got to thinking about the Wii. Each remote utilizes 2 AA batteries.  The wireless sensor bar uses 4 AAs as too.  As a photographer I also use two speedlight flashes. there is 8 more AA without a change, up it to 16 for total functionality.  There are also the two pocket wizards that use 2 AA a piece, there is 4 more.  That is something like 36 AA batteries total.  The next review that I will write will be about the Maha MH-800s that I just purchased to accommodate this AA powered life.

Time Machine/Capsule (The Sort of Cheap Way)

Exciting news for stingy mac nerds.  Well, realistically kinda mac nerds, because a true mac nerd would either know about this already, or would not care because they don’t need time machine.  I have a headless Macintosh running in my home, with an array of external hard drives connected to it and served using AFP.  I originally had an old Windows XP machine running as a Samba share to my mac to host my movies.  That said, AFP and OS X are far nicer to work with.  Anyhow with one simple copy/paste command line cue one can use a shared volume to automatically backup their computer every time said computer connects to said network, and all without a single wire.  That command that needs to be entered is:

defaults write com.apple.systempreferences TMShowUnsupportedNetworkVolumes 1

(to undo the command one would enter the same command with zero in place of 1)

From there you simply use the Time Machine interface to setup your backup.

Fantastico!

The Great Escape

You would think that in this day in age it would not be difficult to switch between technologies and applications and platforms.  After all you can open a word document on a mac now, but that aside, you can virtualize windows on a mac.  With all of that explained, there is still no way to export your address book from AOL.  I don’t use AOL, I don’t condone the use of AOL, I hate AOL.  That said, until this week my mom was still stuck in AOL because she could not remove her contact list and move it to a better option.  I looked into it so we could get her using mail.app.

You start by following the directions here –>

http://www.connectedsw.com/ConvertAolAddressBook.php

Once you have your LDIF file in step three you need to import it into the windows address book (start–> accessories –> address book).  From here you can either use it in windows, or proceed to the mac.  Select the contacts that you want to put on the mac and click and drag them to a folder on your computer.  The files will be copied as vCards which can be used by Thunderbird or Mail.app.

Tah Dah!