Sausage and Cabbage

Tools:

  • Dutch Oven
  • Kitchen knife
  • Cutting board

Ingredients:

  • Skinless Italian Sausage 1 lb
  • Kielbasi 1 lb
  • 1 large onion
  • 1 pound potatoes of choice
  • 1 1/2 lbs turnips
  • 1/2 head cabbage
  • 5 Cloves garlic
  • 1 bottle hard apple cider
  • Brown sugar
  • Salt
  • Pepper

Assembly Instructions:

Preheat oven to 350.  Heat 3 turns olive oil in dutch oven on medium heat.  Slice sausage into 2 inch cubes/sticks.  Sear the sausage in the oil.  While the sausage is searing mince the garlic and dice half of the onion, slice the other half and add to the pot.  Slice kielbasi into bite size pieces and toss into the pot.  Dice turnips into 1/2 cubes, rough is fine, toss into the pot.  Cut potatoes into 3 inch cubes or so, leave skins intact, toss into pot.  Cut cabbage into bite size pieces and add to pot until full.  Salt and pepper to taste, do not undersalt!  Dump the cider into the pot (beer is ok too).  Put in oven and bake for 1 1/2 hours or until done to taste, about half way through taste and sprinkle brown sugar on top and more salt if needed, the potatoes will soak some of the salt, as will the turnips, so it is better to salt as it cooks than all at the beginning.

Thanksgiving 2018: Accardo Style!

Below you will find the recipes used for thanksgiving our way!  Hardware used was as follows:

Aluminum foil roasting rack for turkey with supports.  Large foil for stuffing.  Two smaller foil pans with kids for Mac and Cheese and Chex Mix.

Laurelin’s Gravy:

Salt, pepper, garlic powder, basil, oregano, 1 cup milk with good amount of cornstarch.  Boil drippings, add seasonings, whisk cornstarch and milk together then add slowly to pan while whisking gravy.

Good Eats Turkey:

http://www.foodnetwork.com/recipes/alton-brown/good-eats-roast-turkey-recipe.html

Changes: 

No seasonings, whole head of garlic cut in half, leave plastic leg thing on, 500 for 35min for 20 lb turkey

Ingredients

Roasting pan (foil or otherwise)
1 (14 to 16 pound) frozen young turkey
For the brine:
1 cup kosher salt
1/2 cup light brown sugar
1 gallon vegetable stock
1 tablespoon black peppercorns
1 1/2 teaspoons allspice berries
1 1/2 teaspoons chopped candied ginger
1 gallon heavily iced water

For the aromatics:
1 red apple, sliced
1/2 onion, sliced
1 cinnamon stick
1 cup water
4 sprigs rosemary
6 leaves sage
Canola oil

Directions
2 to 3 days before roasting:
Begin thawing the turkey in the refrigerator or in a cooler kept at 38 degrees F.

Combine the vegetable stock, salt, brown sugar, peppercorns, allspice berries, and candied ginger in a large stockpot over medium-high heat. Stir occasionally to dissolve solids and bring to a boil. Then remove the brine from the heat, cool to room temperature, and refrigerate.

Early on the day or the night before you’d like to eat:

Combine the brine, water and ice in the 5-gallon bucket. Place the thawed turkey (with innards removed) breast side down in brine. If necessary, weigh down the bird to ensure it is fully immersed, cover, and refrigerate or set in cool area for 8 to 16 hours, turning the bird once half way through brining.

Preheat the oven to 500 degrees F. Remove the bird from brine and rinse inside and out with cold water. Discard the brine.

Place the bird on roasting rack inside a half sheet pan and pat dry with paper towels.

Combine the apple, onion, cinnamon stick, and 1 cup of water in a microwave safe dish and microwave on high for 5 minutes. Add steeped aromatics to the turkey’s cavity along with the rosemary and sage. Tuck the wings underneath the bird and coat the skin liberally with canola oil.

Roast the turkey on lowest level of the oven at 500 degrees F for 30 minutes. Insert a probe thermometer into thickest part of the breast and reduce the oven temperature to 350 degrees F. Set the thermometer alarm (if available) to 161 degrees F. A 14 to 16 pound bird should require a total of 2 to 2 1/2 hours of roasting. Let the turkey rest, loosely covered with foil or a large mixing bowl for 15 minutes before carving.

Recipe courtesy Alton Brown, also featured in Food Network Magazine

Read more at: http://www.foodnetwork.com/recipes/alton-brown/good-eats-roast-turkey-recipe.html?oc=linkback


Apple Almond Cranberry Salad:

Dressing found from, no cheese used, or apples, so basically salad with cranberries and almonds.

http://lecremedelacrumb.com/2014/10/apple-cranberry-walnut-salad.html

  • 1 cup apple juice
  • 4 tablespoons apple cider vinegar (or white vinegar in a pinch)
  • 2 tablespoons honey
  • scant ½ teaspoon salt
  • ¼ teaspoon black pepper
  • ¼ cup oil

Fannie Farmers Mac and Cheese:

http://www.food.com/recipe/fannie-farmers-classic-baked-macaroni-cheese-135350

Directions:

  1. Preheat oven to 400°F.
  2. Cook and drain macaroni according to package directions; set aside.
  3. In a large saucepan melt butter.
  4. Add flour mixed with salt and pepper, using a whisk to stir until well blended.
  5. Pour milk and cream in gradually; stirring constantly.
  6. Bring to boiling point and boil 2 minutes (stirring constantly).
  7. Reduce heat and cook (stirring constantly) 10 minutes.
  8. Add shredded cheddar little by little and simmer an additional 5 minutes, or until cheese melts.
  9. Turn off flame.
  10. Add macaroni to the saucepan and toss to coat with the cheese sauce.
  11. Transfer macaroni to a buttered baking dish.
  12. Sprinkle with breadcrumbs.
  13. Bake 20 minutes until the top is golden brown.
  14. (You can also freeze this recipe in zip-lock bags for later use – once you have mixed the macaroni along with the cheese sauce allow to cool to room temperature before adding to your freezer – I generally pull it out the night before and allow macaroni and cheese to reach room temperature; I then add the macaroni and cheese to a buttered baking dish, sprinkle with bread crumbs and then bake for 20 to 30 minutes, until golden brown on top and bubbling.


Cranberry Relish:

http://www.simplyrecipes.com/recipes/cranberry_relish/

Changes: 1.5 times the fruit, 1/4 cup sugar.  Really good mixed into vodka, gin, etc

Ingredients

  • 2 cups rinsed raw cranberries
  • 2 skinned and cored tart green apples, cut into thick slices
  • 1 large, whole (peel ON) seedless orange, cut into sections
  • 1 to 2 cups granulated sugar (depending on how sweet you would like your relish to be)

Method

1 If you are using an old fashioned grinder, use the medium-sized grinder plate and set the grinder on the edge of a table with a large bowl or pan to catch the fruit mix as it is ground. Old fashioned grinders tend to leak juice down the grinder base, so you may want to set up a bowl underneath to catch the drips.

If you don’t have an old fashioned grinder, you can use the grinder attachment to a KitchenAid mixer, or you can use a food processor. If you use a food processor, be careful not to over-pulse! Or you’ll have mush instead of relish.

You can also just chop very finely by hand, but that’s difficult, especially with the cranberries.

2 Push the cranberries, orange sections, and apple slices through the grinder. Include the orange peel! Alternate the fruit as you push it through the grinder so that different fruits get ground together.

3 Stir in the sugar. (Start with less than a cup and keep adding 1/4 cups until you reach your desired level of sweetness.) Let sit at room temperature until the sugar dissolves, about 45 minutes. Store in the refrigerator until ready to use.

Read more: http://www.simplyrecipes.com/recipes/cranberry_relish/#ixzz3KOVx5R6x

The Neely’s Cornbread Stuffing:

Changes: Used bacon ends, cooked in advance, chopped finely and the follow.

http://www.foodnetwork.com/recipes/patrick-and-gina-neely/neelys-holiday-cornbread-stuffing-recipe.html

Ingredients
3/4 pounds bacon, cut into chunks
2 large onions, chopped
4 ribs celery, chopped
1 tablespoon chopped fresh thyme
1 tablespoon chopped fresh sage
2 (16-ounce) bags dried corn bread stuffing mix
4 cups chicken broth
1/2 stick butter
Directions
Preheat oven to 350 degrees F.

Cook bacon in a heavy skillet until crisp. Turn heat down and add onions and celery; saute until tender, about 6 minutes. Add the thyme and sage and saute until fragrant. Stir in pecans.

In a large bowl, add the cornbread mix, bacon and vegetables, and stir in the chicken broth. Add to a 13 by 9 by 2-inch casserole dish. Add butter slices to the top of the casserole and cover with foil. Bake for 30 minutes then remove foil and cook until top is crisp, about 15 more minutes.

Recipe courtesy The Neelys

Read more at: http://www.foodnetwork.com/recipes/patrick-and-gina-neely/neelys-holiday-cornbread-stuffing-recipe.html?oc=linkback

Candied Cranberries:

https://damndelicious.net/2013/12/22/sugared-cranberries/

INGREDIENTS:

  • 2 cups sugar
  • 12 ounce bag fresh cranberries

DIRECTIONS:

  1. Combine 1/2 cup sugar and 1/2 cup water in a medium saucepan over medium heat, stirring until sugar is dissolved, about 2-3 minutes.
  2. Stir in cranberries until well coated.
  3. Using a slotted spoon, transfer to wire rack; let dry for at least 1 hour.
  4. Working in batches, roll cranberries in remaining 1 1/2 cups sugar until well coated
  5. let dry for at least 1 hour.

Holiday Sangria:

Inspirational credit: http://decorandthedog.net/decorandthedog/2013/12/9/holiday-sangria#disqus_thread

Note: we doubled this for 10 people, with other drinks being served.  If in doubt double and drink more.

Ingredients:

  • 1 Orange
  • 1 Apple
  • 1 Cup Cranberries (Fresh)
  • 1 Bottle Sparkling Apple Cider
  • 1 Bottle White Wine (Moscato, Pinot Grigio)

Directions:

Night before mix wine and fruits in serving container, let marry overnight in refrigerator.  Prior to serving add in chilled cider to keep carbonation from flattening.

Bike Restoration Project

Scratch the restoration.  Customization.

For my 25th birthday my brother gifted my wife and me two old, slightly ratty bikes.  Mine is an old JC Penny with a slick friction shifter 5 speed.  My wifes is a 2 speed kick shift 1963 Schwinn.  Hers is mechanically quite solid, but rusty and a bit bent up on the fenders.  I am planning to do the JC Penny in a flat black frame and polish the chrome as much as possible, with orange accents.  The schwinn is going to get done in a coral tone with white fenders and other accents.  Pics to follow…

Hosting Options

If you watched the Super Bowl you are aware that hosting is big business.  However, like all business not all competitors are equal and for quite a few different reasons.

Money: Show me the money.  The first thing that pretty much all of us look at is the price tag.  To a degree money does talk, as with most things you get what you pay for, and fortunately there are ways around that.  There will be two things that you pay for, hosting and a domain.  Never, ever, ever, pay more than 9.95/year for a domain.  When you buy a domain you are buying the fees for a company to work with ICANN (the supersecret people who run the internet) to register and maintain the name for you.  The hosting that you will pay for is for the portion of a server to actually hold the files.

Hosting: There are nearly an infinite number of variables for this so I will relate it to something that you are all familiar with; cell phone plans.  Both numbers are basically like minutes on your cell plan.  You have X amount, don’t go over.  There are two numbers you will see most frequently are bandwidth and storage.  The bandwidth is how much data you may move per a period of time.  Normally in our modern times, bandwidth is measured in GB (gigabytes) per month.  The bigger this number the better, but realistically anything over 4GB/month should be more than sufficient for a basic photographic site and blog.  Storage is slightly more finicky.  Make sure that you read the contract, as nearly all of them will stipulate no file storage that is not related to the website.  For instance, they could cancel your website for hosting an unrelated song or movie.  Also, much like a phone bill you will get SLAMMED for going over your allotted amount at most hosts.

Hosts: As far as I am concerned there are three categories of hosts.  Those that I recommend, don’t recommend, and know nothing of.

Recommended: Dreamhost…

Don’t Recommend: GoDaddy, A-plus, any company that seems a LOT cheaper than anyone else, ANY host running ANY iteration of windows server.

Know Nothing of: Anything not listed above.

After all is said and done 1 year of hosting with a domain should cost about $100.  Make sure that you search for coupon codes, sometimes 20 seconds of searching can save you over $50!

Basic Web Terminology

This will be the first in a line of informational posts for those looking into starting a website, or just learning more about how these things work.  Before we dig into the really big details, and the smaller (equally important) nuances, we need to lay down a solid foundation.  The following is going to be a pyramid style list of terms, from most basic building upward.

Internet: A connection of computers.  In our case regarding a long distance connection between a server and a client.

Server: A computer that is left running and available to client computers.

Client: A computer that is connecting to a server.  In a standard, everyday, setup this is your computer as you read this.

Host: A host is the entity that manages the servers and related technologies that make them run.  This will be the person that you pay.

Generic Top Level Domain (gTLD): You know these as .com, .org, .net, .edu…  This can be important as most people will instinctively enter .com and it can be confusing if you choose a .net that has a less than favorable .com counterpart.

Domain: This is the address portion of your website.  For instance if you look above the domain of this website is jaccardo.com.  For our purposes the www and the http at the beginning don’t matter as it is considered a good practice to make both www and http only both function.

Subdomain: This is anything that goes before the domain.  An example of this would be webmail.psu.edu.  The webmail portion is a subdomain.  For all intents and purposes it is an entirely separate website.

Subdirectory: This is the folder structure that follows the gTLD.  In this case /2011/02/17/web-terminology.  /2011 is a folder, /02 is a folder, /17 is a folder.

File Transfer Protocol (FTP): The way that we connect to the file side of our websites.  An FTP client allows you to navigate and manipulate the files on the server as if they were on your computer.  It often will mimmic the Finder on a mac, or windows Explorer on a PC.

Secure File Transfer Protocol (SFTP): A more secure file protocol.  If it is available for your server and your client application you should use this whenever possible.

Content Management System (CMS): A way to keep your files sorted and managed.  This website is powered by wordpress.  A site can be backed by many different technologies, or entirely lack a CMS and be made separately.

fresh tomato salad

So simple, so juicy, so delicious. Fresh garden grown tomatoes are one of summer’s little pleasures. This past summer my brother planted a couple of plum tomato plants. The fruit yielded is large enough to work with, but small enough that sauce becomes an exercise in patience. Salsas are great because they allow you you to chop easily, but then you need tortillas and a slew of other ingredients. I am going to adapt one of my favorites here to what I had on hand, and it was delicious.

Ingredients:

  • Fresh plum tomatoes (roma, cherry, etc would also work)
  • Balsamic Vinegar
  • Olive oil
  • Oregano
  • Basil
  • Feta or Mozzarella

Tools:

  • Sharp French or Santoku
  • Cutting surface
  • bowl that will hold cut tomatoes
  • plate to serve

Preparation:

  1. Cut tomatoes into desired pieces
    1. I cut lengthwise then
    2. Skin down then
    3. Cut accross
      1. This prevents the fruit from getting squashed
  2. Drizzle with balsamic vinegar
  3. drizzle with olive oil
  4. season with basil and oregano to taste
  5. add half of the total amount of cheese that you wish to use
  6. put plate on top of bowl
  7. Flip the bowl/plate gently, this will mix the ingredients
  8. top with rest of desired cheese for texture and touch of seasoning.

Tips:

  • Don’t throw out the juice at the bottom!  You could…
    • dip bread in it
    • use on salad
    • brush on meat while grilling
  • Serving with bread can help to cut down the acidity of this dish

Enjoy!


download button

I am generally opposed to download buttons because they conceal the location of the file being downloaded, a security down.  However there are times and places where a download button can be used appropriately.  I am going to use it below as the screenshot at demo, and because I am security minded I will give you the path here:  jaccardo.com/upload/downloads/icons/download-button.png

UniBody Drives

I designed this set of drives inspired by the unibody construction of the new macs.  I wanted to just find a set and use someone else’s design.  Unfortunately I could not find a single design that I liked, and set out to make my own.  The basic design is pretty simple but functional, kind of like the mac products it emulates.  If anyone wants the PSD files let me know.

You can get the PNG and ICNS files here: http://jaccardo.com/upload/downloads/icons/unidrive.zip

iTunes iCons

I always found the iTunes icon ugly, not so much hideous, but more of an un-apple like decadent application of gloss and shine.  Back then it was green on a CD, and I was on windows XP.  When I switched to the mac something odd happened though, the icon got uglier.  The Mac’s better icon handling and crisper detail revealed how odd the icon was.  First of all, the CD was some sort of archaic throwback that apple held onto.  I found it odd that iTunes was using a CD for an icon when the application itself is focused on digitizing your music collection.  Well, I found icons throughout the internet but was never happy with their designs for one reason or another.  Often times the icons were only 256×256 or lower.  Well, never again.  I designed these for myself, but if someone can use them then all the better.  The icons are all 1024px and are vectorized so that they can be scaled later if need be.  I have included both the PNG and ICNS files so that all platforms can make use.

You can get the files here:   http://jaccardo.com/upload/downloads/icons/tunes.zip

galleri

When I first began coding wordpress sites I would do what most new designers do.  I would look at an existing design and then add and subtract from it until it was close to what I wanted.  The problem with that was that the code often became messy, had extra lines, and would break in obscure ways down the road.  Updates became nearly impossible.  The first site design that I ever created without this method, did really well.  Artists loved it for displaying their work.  It was essentially nothing but a header image, a menu and content below.  However, that was two years ago, and since then that code is now slightly depreciated.  I have opted to upgrade the entire design as a child theme to twentyten (the new default wordpress theme).  This theme fully supports all of the twentyten features.

You can get the theme here:  http://jaccardo.com/upload/downloads/themes/galleri.zip

Alton Brown’s Granola

Ingredients:
• 2 cups 100% Oganic Rolled Oats
• .5 cups Sunflower Seeds
• 1 cups Almonds
• .5 cups Wheatgerm
• .5 cups Honey, 1 Tsp
• .25 cups Sugars, Brown
• 2 tablespoons Butter
• 2 teaspoons Vanilla Extract
• .25 servings
• .333 cups Raisins, Seedless
• .333 cups dried cranberries
• .333 cups Appricots, Dried
Instructions:
Butter a 9 by 9-inch glass baking dish and set aside. Preheat the oven to 350 degrees F.
Spread the oats, sunflower seeds, almonds, and wheat germ onto a half-sheet pan. Place in the oven and toast for 15 minutes, stirring occasionally.
In the meantime, combine the honey, brown sugar, butter, extract and salt in a medium saucepan and place over medium heat. Cook until the brown sugar has completely dissolved.
Once the oat mixture is done, remove it from the oven and reduce the heat to 300 degrees F. Immediately add the oat mixture to the liquid mixture, add the dried fruit, and stir to combine. Turn mixture out into the prepared baking dish and press down, evenly distributing the mixture in the dish and place in the oven to bake for 25 minutes. Remove from the oven and allow to cool completely. Cut into squares and store in an airtight container for up to a week.

Ingredients:• 2 cups 100% Oganic Rolled Oats• .5 cups Sunflower Seeds• 1 cups Almonds• .5 cups Wheatgerm• .5 cups Honey, 1 Tsp• .25 cups Sugars, Brown• 2 tablespoons Butter• 2 teaspoons Vanilla Extract• .25 servings• .333 cups Raisins, Seedless• .333 cups dried cranberries• .333 cups Appricots, DriedInstructions:Butter a 9 by 9-inch glass baking dish and set aside. Preheat the oven to 350 degrees F.
Spread the oats, sunflower seeds, almonds, and wheat germ onto a half-sheet pan. Place in the oven and toast for 15 minutes, stirring occasionally.
In the meantime, combine the honey, brown sugar, butter, extract and salt in a medium saucepan and place over medium heat. Cook until the brown sugar has completely dissolved.
Once the oat mixture is done, remove it from the oven and reduce the heat to 300 degrees F. Immediately add the oat mixture to the liquid mixture, add the dried fruit, and stir to combine. Turn mixture out into the prepared baking dish and press down, evenly distributing the mixture in the dish and place in the oven to bake for 25 minutes. Remove from the oven and allow to cool completely. Cut into squares and store in an airtight container for up to a week.

Applications that you should be using

There are a few applications that I would like to spend time talking about here for a minute.  They are applications that every single person on the planet should have installed on their machine.  Some of them are going to be slightly vague in description, but are all the same important.

VLC (VideoLan Client) – Mac, PC, Linux – Free

VLC is a phenomenal lightweight media player that plays pretty much anything you throw at it.  If a friend says to you check out this song,  VLC.  If someone bought a new digital camcorder and their computer cannot play it, VLC.  The little traffic cone icon will sit there quietly, not installing junk all over your computer and will save the day when you need it.  I have VLC playing back music on a linux computer in my garage that is from 2000, so on a modern computer, it is incredible.

http://www.videolan.org/vlc/

OpenOffice.Org (OOo) – Mac/PC/Linux – Free

OpenOffice.Org is a productivity (word processing, slideshow presentation, spreadsheet, database, etc) suite.  What sets open office apart from options like microsoft word is the price tag.  OpenOffice can also handle and create files to work with the Microsoft offerings.  Essentially, unless you have a job that requires constant use of Microsoft products then you and your kids should be using OpenOffice.

http://www.openoffice.org/

A Standard Compliant Browser – Mac/PC/Linux – Free

This one really doesn’t apply to people on Macs or Linux.  There are quite a number of free, stable, open-source web browsers that are simply great.  Now on all platforms we have Google’s Chrome and Mozilla’s Firefox.  They are both wonderfully fast and secure browsers.  If you are looking for a simple to use browser that allows people to just type in one box to search and to type in urls chrome is the man.  If you want a highly extensible browser that you can load with themes and plugins and more themes, Firefox is the one.  On Mac I really like Safari (bonus that if comes on the computer) and there are some who like Firefox.  Basically the moral of the story is that as long as you DO NOT USE INTERNET EXPLORER, all is good.

http://www.google.com/chrome/

http://www.mozilla.com/en-US/firefox/firefox.html

http://www.apple.com/safari/

Freedom

The truth is, all might be free if they valued freedom, and defended it as they ought.

— Samuel Adams

Liberty

If ye love wealth better than liberty, the tranquility of servitude better than the animating contest of freedom, go home from us in peace. We ask not your counsels or arms….

— Samuel Adams, August 1, 1776

review: i am not a paper cup

It seems silly to review and critique something as simple as a coffee cup.  However, that silliness fades the first time that you shower yourself with magma-grade coffee or dump a mugful on the carpet of your car.  The i am not a paper cup has, for me, solved most of these problems.  It is essentially a ceramic and silicone mug designed to look exactly like a paper cup.  It also acts just like a paper cup in the handling aspect.  It does not have any sealing features or ways to prevent you from dumping the whole mug, but it also prevents you from leaving it rolling around behind your car seat.  The cup was revolutionary for me as I always enjoyed the design of disposable cups.  They also provide a convenient level of protection against spills (read: enough protection to use near a computer).  Perhaps out of all of the awesome things this mug can do, my favorite is that the entire assembly can be popped into a microwave for a warmup.  Also worth mentioning is that the cup fits perfectly in 99% of car cup holders, something that cannot be said for most travel mugs.

All is not roses though with the i am not a paper cup.  The largest single downside is that the cup itself will set you back $16.00.  There are generic versions that are starting to become available, however, they defeat the purpose of having a ceramic mug, and the sealing quality of the silicone lid.  The second largest pitfall is the carrying capacity of 10 oz.  This is fine for around the house and when at places that there is a never ending fountain of coffee, but when on the road this number seems quite small.  The other downside to the 10 oz thing is that the 10 oz is measured from the very top of the cup, a place that I am not comfortable filling to when out and about.  This drops the effective volume to more like 9 oz.  There is also a fiscal drawback that can occur while using this device.  Refills are normally less expensive oz for oz but when your mug looks like the stores 16 oz cup and weighs in at 9 oz, you see where I am going.

I will attach a picture of the mug with some more updates a little later on.

Linux – What is it? Why do I care?

Linux is an open-source operating system that can be installed on a wide variety of hardware.  Most distributions (the term used for varieties) are free and very well documented.  There are two distributions that I highly recommend, but before we get to those I want to address the two questions above.

What is it?

As featured above, linux is an operating system.  That means that it is the part of the computer like Windows XP, Vista, 7 or OS X.  The majority of what is it will be answered below in the…

Why do I care?

You should care for a couple of reasons.  If for nothing else Linux is free, as in a free cup of coffee, and free as in the 1st amendment.  This creates a low cost highly secure and stable platform.  Linux is a very valid option for keeping an old computer running.  It does not come with any bloatware (junk that comes pre-installed on modern computers), which allows it to run faster with lower requirements.

Linux is also more secure for a variety of reasons.  The primary reason is that there is no push to write viruses and spyware for a platform used by only 1.3% of computers.

I use Linux based machines for data recovery because they are the only stable option that can read and write to ALL of the disks from ALL operating systems used in recent years.

Recommended Distributions:

I highly recommend ubuntu for most beginners because of the huge user base and the amount of support that can be found.  My personal favorite is Linux Mint.  Mint is built on ubuntu and includes basic add-ons that 90% of users will install anyway (flash plug-ins, etc).

copy protected os x files with linux

Earlier today I completely decimated my OS X partition on my MacBook Pro (ironically trying to make a non-destructive USB based linux drive).  The process went hay wire when I tried to get rid of a messed up EFI partition that was created and causing booting issues.  I deleted the messed up partition and then got greedy.  I tried to reallocate the space using the Gparted utility in Linux Mint (linux for the rest of this article, same for Ubuntu and all debian based distros).

Boot into the LiveCD:

The first step is to pop the LiveCD into the drive and hold down the opt key while booting.  Select the disc titled WINDOWS.  I know confusingly weird.

Prepare to see some terminal:

You are not going to listen to me now.  You are going to try to copy data from the recently messed up OS X drive and it is going to deny your permission.  Go ahead, try.  Now that we have that out of our system lets move some files.  You could get all nerdy and us the cp command, and if you knew that you wouldn’t be reading this article.  Fire up a terminal window by going to menu –> accessories –> terminal.  Next you are going to copy/paste or type:

sudo nautilus

This will open a window as the root user.  Next you are going to repeat the above command.  Following that you are going to navigate to the directory you would like to backup.  In the second window you are going to navigate to your backup drive.  Then you should drag and drop what you want to the backup.

Sit back and revel:

Now you look like a pro for having saved your (clients) data, and you can kick back and take a nap while the files transfer

Canon SD780is CHDK

If the above looks like gibberish to you, it is because it sort of is.  It is referring to an add-on style menu system for canon point and shoot cameras.  The biggest selling point to me is that it enables the camera to save RAW files in the DNG format.  I think that canon should enable this feature out of the box anyhow, but that is not the point.  In the end, it turns my girlfriends already capable SD780is into a monster of a pocket camera.  Adding all kinds of functionality that was not in the original camera.  It is also non-permanantly stored on the SD card, allowing she and I to swap cards and have the camera function exactly as before.  Just awesome.

picking a point and shoot

If someone asked me which consumer point and shoot they should buy (a question I get often), I would say that they should go get whichever Canon is in the color and price range they want.  The next thing I hear is, “but, but, but, you shoot Nikon.”  I believe that in the SLR/Professional world there is more ergonomic and economic decision making (I already have/can borrow these lenses accessories).  When it comes to point and shoot cameras the following are important thoughts:

Cost:  Be realistic on your budget and mentally accept that in our current society buying a $150 camera every other year instead of the $300 camera now is actually probably better.

Menus:  Whatever you buy make sure that you can use the menu system well and quickly.  Often the menus are designed by engineers and professional photographers who are not thinking about how non-photographers use cameras.

Storage:  Sony makes a great point and shoot.  They are also great at using marked-up proprietary hardware.  If you are on vacation and run out of memory space in the middle of nowhere you are definitely going to be able to find SD cards, conversely the latest Sony MiniHDsTick+micro whatever, probably not.

Battery:  I am a firm believer in carrying extra batteries.  What that means to you is probably slightly different than it is to me.  If your camera uses AA batteries carry extras and know that you can buy replacements if need be.  If your camera uses a rechargeable battery buy a second or third keep it charged and bring it along.  If the camera you are looking at doesn’t have a removable battery, buy a different one.

Size:  AKA, smaller is better, sometimes.  If you are young and have nimble fingers then a small, slim point and shoot can be awesome.  If you are older and/or less dexterous, then a slightly larger model might be a better fit.

As always, hope that helps out, and if you have questions hit the contact/comment button.

Home Networking Decisions

The time has come to finally get your computer away from your desk, or that wireless router that your cousin hooked you up with has finally given up the ghost.  Have no fear, Joey is here.  Below are a few scenarios that should cover most users.

The Hardware.

I want to plug it in and be done.

Hands down, no discussion required, buy an Apple Airport Express.  The only downside is that there is no ethernet switch.  In other words, you can only connect wirelessly as there is only one port on the back.  Another cool ability of the express is to connect a USB printer to the device, which allows for wireless printing.  Another awesome use for the express is turning ethernet hotel/friends house connections into wifi for you and your more connected buddies.

Apple Airport Express

I have more advanced needs than above but want easy.

What the Airport Express lacks in ports and additional features, the Airport Extreme more than makes up for.  The biggest downside to the extreme is its cost and physical size.  However, if you want to be able to share a hard drive easily, and a printer, and plug in a bunch of computers and also have a guest network, well, the Extreme is for you.

Airport Extreme

I have advanced needs and want to save money.

The following two are routers that I have close relationships with (I own them both).  What the apple options lack in low price, these two make up for.  The biggest down to these two is that they are not nearly as user friendly as the apple options.  However, for the average user, with a little bit of learning and a cup of coffee, they are more than viable options.

Linksys WRTG54

D-Link DIR-615

The Settings.

To encrypt or not to encrypt.  This is actually becoming a tougher question, and I have a solution for you.  The original school of thought was whether or not you wanted to share your network with friends who were visiting or neighbors, yeah, who doesn’t?  Well, let me pose a hypothetical to you.  What if your neighbor gets caught downloading some form of illegal content on your connection, who is liable?  I don’t know about you, but I don’t want to find out.  What if you are paying for a 10mb/sec connection so you and your kids can have really fast internet, and then people start parking their car in front of your house, so they can have free internet?  Oh, and by the way did I mention that they are massively downloading and now your speed has dropped.

The above makes a clear argument for strongly password protecting your network doesn’t it?  Unfortunately nothing in life is black and white.

How about when a friend, or your kids friends come over and want to play PSP, DSi, Wii, or use an ipod/iPhone without using their data connection?  You would need to give them the coveted password.

So are you ready for compromise?

Make the password something reasonable, that you use for NOTHING ELSE.  Then take a sticky note, and write the password on it, and put it in a place that guests can get to, like the refrigerator.  Essentially your are granting permission from those who are allowed into your house.

As usual, if you have more questions/scenarios, hit the comments or the contact button above.


Choosing a Computer

This is a very interesting and complex topic that has been addressed thousands and thousands of times by many people.  Those people have been both right and wrong and most often somewhere in the middle.  There are a few considerations that need to be made when purchasing a new computer, so let’s dive in.  Keep in mind that there really is no particular order to these, but the order I will lead you in will make it the least overwhelming.

Where will I use the computer?

If you have never taken a computer off of its desk or thought about it, odds are a desktop is for you.  As I write this now, I am sitting on a patio behind my house something that could not be done effectively with a desktop computer.  Also, if you frequently travel and work outside the home take that into account when choosing a computer.  If you fall into a specific niche category regarding inside and out usage we will hit that down further.

summary:  if you use the computer exclusively at a desk and are happy with that, buy a desktop; if not buy a notebook.

What do I need to do?

Modern computers have come a long way, and that is probably the most misunderstood thing about them.  When you go to a chain computer retailer they will often attempt to sell you the biggest, baddest, and fastest machine possible.  That is quite fine if you have a large checkbook, however, for the rest of us, compromises must be made.  Some basics to understand:

Light Usage:  This is the type of person who will write the occasional text document, email, and general web browsing.  Organizing pictures and video files, and watching movies and TV online.  In all honesty, 90% of users meet this criteria.  Just keep this in mind when shopping.

Medium Usage:  This is the trickiest usage level to placate.  This is using enough raw power to realize that your computer might not do what you need.  It is further complicated by a general straddling of price points.  Often this will involve playing back HD video, or massive quantities of multi-tasking.

Heavy Usage:  This is for gamers, photoshop experts, video producers etc, etc.  If you are in this category you probably don’t need/want help choosing.

How big/small of a screen do I want/need?

Screen sizes these days span from 8.9″ to 50+”.  So which one do you need?  The answer varies based on your answers to the above two questions.  If you plan to take the computer on travels and use it for nothing else, a cheap and tiny 10″ netbook is probably fine.  If you want to watch movies in dazzling HD in your living room you are probably better off with a giant TV and a decent desktop machine attached.  Also, keep in mind the vision of those who will be using the computer.  If you are buying a computer for the entire family to use, it can be frustrating to those without perfect vision to need to squint at a tiny screen.

How much do I have to spend?

Let’s face it, money plays a big part in these decisions.  If it didn’t you could just go buy one of each, and give away the ones you don’t use.

Super Limited Budget:  If you are working on a super limited budget it might be worth your time and effort to look into re-utilizing an older computer you already have by cleaning it up.  Another often inexpensive option is to talk to friends/relatives about purchasing their computers from them when they are ready to upgrade.  This gets you a decent machine for less money, and they get cash toward a newer machine.  This approach also lessens the “what’s wrong with it?” factor.

Average Budget:  This is the biggest market currently, and luckily for you the companies want to sell you a machine.

Willing to spend a little:  This is the most future proof to cost effective range and options are still plentiful.  These are normally upgraded machines from the category above.

Hog wild:  If you are in this category decide whether you want a mac or a PC and go to the store, buy the best one they have that meets your needs.

Advice.

If you need a tiny machine that can go anywhere inexpensively buy a netbook.  For 300 bucks you get a competent computer that can hold up to light usage.  Downside is small screen and cramped keyboards, as well as no optical drive (NO DVD SLOT).

If you need an average sized laptop with average performance I would look at Toshiba, Apple, ASUS, HP and Dell.  These are just starting places though.

If you need an average sized laptop with high performance I would look at Apple, ASUS, and Sony.

If you need a low performance desktop I would look into the above average laptop with an external screen and keyboard/mouse.  This gives portability with low cost.

If you want a media center computer look for mac Minis and for Desktop machines that come without any extra peripherals.

Things that you should take into account are also what other devices you have regular access to.  If you have a powerful desktop and a smartphone you probably dont need a mid-sized laptop.  If your work supplies you with a competent computer, but you are not allowed to use it for personal use, then a netbook might be a great travel add-on.

If you have peripherals that you really like, or need to continue using, ensure that they will work with what you are buying and in a way that is feasible for you (POS systems, accessibility devices, mice, joysticks, printers/scanners etc)

As always if you want additional advice hit me up on the contact page, or in the comments below.

applications that I need to live

This post is going to be dedicated to a group of applications that are all freeware, and absolutely phenomenal at what they do, generally lightweight, and very stable.

Cyberduck [mac]

Cyberduck is an excellent mac only FTP client.  It allows for the editing of files on the server and saving their updates in an external application.  I would also like to mention that development is quite fast paced, and very well maintained.  A final note, this application scores extra points for having an awesome dock icon.

get it from here:  cyberduck.ch

Smultron [mac]

Smultron is an excellent lightweight text editing application.  It is straight forward to use yet quite feature rich.  Imagine an amped up version of your basic notepad/textedit.  If you feel like the text editing application you are currently employing is missing a feature, take a look at smultron.

get it from here: smultron.sourceforge.net

VideoLan Client (VLC) [mac/pc/linux]

Ever get a video or audio from somewhere and receive an error that it could not be opened, or a window prompting you to choose the application.  VLC is able to open pretty much any file you throw at it, and is used as the backend for a lot of other freeware applications.

Get it here:  videolan.org/vlc/

Handbrake [mac/pc/linux]

Handbrake is one of the best applications to use for shifting the format of content.  Have a DVD that you want to put on your iPod/iPhone/iNewDevice, use Handbrake.  Have a video file that you want to transcode to a smaller size/audio quality/container format.  The newest version of Handbrake brings that application an even greater level of stability and ease of use.

Get it here:  handbrake.fr


Pray for Better

I came to the conclusion long ago … that all religions were true and also that all had some error in them, and whilst I hold by my own, I should hold others as dear as Hinduism. So we can only pray, if we are Hindus, not that a Christian should become a Hindu … But our innermost prayer should be a Hindu should be a better Hindu, a Muslim a better Muslim, a Christian a better Christian.

  • Young India (19 January 1928)
  • Mohandas Ghandi

Basic Homemade Pasta

Ingredients:

1 3/4 cups flour

2 large eggs

1 Tbs olive oil

1/4 cup water

Prep:

1. In large mixing bowl, combine flour, eggs, and olive oil.  Beat for 1-2 minutes.

2. Add the water in small increments (about 1 Tbs at a time) until the dough is able to form a dry ball.  The dough should stick together when you pinch it, but should not stick to your fingers at all.

3.  Roll the dough into a 2.5 inch round log.  Cut dough into 1/2 inch portions.

4. Use your pasta maker’s instructions accordingly.

5. Enjoy your delicious pasta with some yummy sauce.

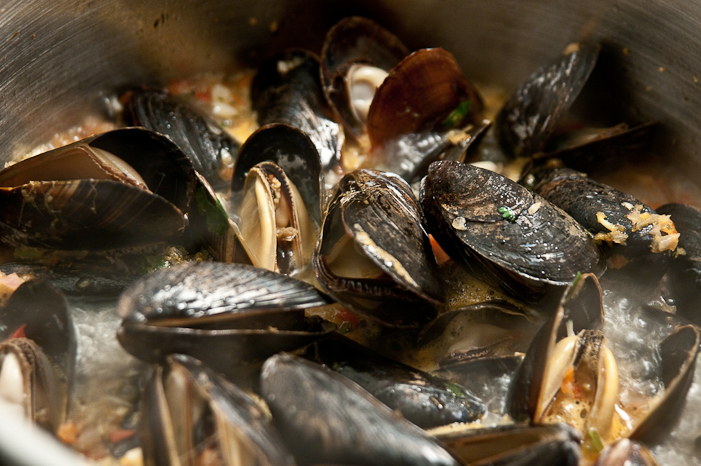
Frutti di Mare (Mussel Version)

If you love mussels and consider yourself to be human, you will love this recipe. On to the show.

ingredients:

  • between 1 and 2 pounds of mussels
  • white wine
  • 8 cloves fresh garlic
  • cilantro if you have it
  • butter
  • olive oil
  • oregano
  • basil
  • pepper
  • nice italian rolls
  • (diced bell peppers optional for color and flavor)

preparation:

  1. coat bottom of steel stock pot with oil, minced garlic, wine, butter and seasonings to taste
  2. bring to a simmer
    • while sauce is heating clean mussels with cool water
  3. add mussels
  4. cook covered until mussels are open and tender (4-5 minutes to be safe yet tender)

note:make sure that you have enough juice to prevent the pot from running dry and burning and to have sauce to dip your rolls in as you eat.

Mangi

my computer is broken, now what?

I am going to go over the basics of both Mac and PC problem solving. Most of these solutions seem simple, and they are, however, it is important to follow them to a “T.” We will start off with the Mac, and move to the PC.

Mac Troubleshooting:

Although Mac computers do tend to break less often than their PC counterparts, they still do, and often in a big way. When things go wrong go by the following steps.

  1. make sure that it is plugged into a WORKING outlet, plug in a lamp and see if it works.
  2. if the computer is running and acting oddly try a simple restart.
    • after shutting down the machine, allow it to sit for a little, this is part hangover from older technologies, but still a good practice.
  3. check for updates to both problem software and the operating system itself (select the apple menu from top left and select software update).
  4. if the oddity persists follow this guide to maintenance.
  5. if the oddity continues I recommend you try resetting your PRAM. A full guide can be found here. For the ADD in the crowd you hold down command + option + P + R while restarting. The computer will chime once and then start again, and chime then you let go.
  6. if 4 does not work then try removing any software that was installed recently with regard to the onset of the problems.
  7. find your way to disk utility.app (applications -> utilities -> disk utility) and select the correct hard drive from the panel at left and select first aid. Then select verify disk. If any problems are encountered follow the instructions.
  8. If all else fails make sure that you have your stuff backed up well and find the discs that came with your computer, it is time for a reinstall.

PC Troubleshooting:
When PCs go awry it can be slightly more challenging as there are also viruses and spyware to contend with. However the first thing to check is always the steps 0 through 2 above.

  1. if you don’t have antivirus software installed find a reputable scanner that you trust. There are many that are free and quite able.
  2. if you have not run any anti-malware applications I would do so. (I recommend spybot search and destroy and lavasoft ad-aware)
  3. after completing step 1 reboot the machine.

Those are simply the basics, as I am a Mac guy, I am not comfortable enough walking through the steps that will lead to a repaired windows machine, however, articles like this one can be very helpful.

using your wordpress powered simpleviewer photography site

Once your wordpress based site with galleries powered by wp-simpleviewer is setup it is super easy to create galleries and be on your way.

Step 1

  1. Launch your FTP client (cyberduck for mac and filezilla for PC)
  2. navigate to the following folder
    • yoursite.com –> wp-content –> photos
  3. name your folder of JPEGs something appropriate (portrait, dogs, cats, product7, etc)
    • avoid using characters and other funky naming systems
  4. drag and drop your folder of JPEGs to the photo directory you found in step 2

Step 2

  1. Launch your web browser
  2. navigate to yoursite.com/wp-admin
  3. select “wp-sv galleries” from under the media heading on the left sidebar
  4. select the radio button of the gallery that you would like to generate
  5. select create gallery
  6. allow the browser to sit and wait undisturbed until a yellow box appears that says “yeah we are done” at the bottom

Step 3

  1. Select create new page under Pages on the left sidebar
  2. select the first button above the formatting bar
    • the icon looks like a gallery and when hovered over says wp-simpleviewer
  3. select the desired gallery
  4. select insert into post
    • if you desire a statement below/above the gallery you can input text accordingly either below or above the line of code that is inserted in step 3
  5. over on the upper right side of the screen you can select privacy settings
    • private prevents the page from appearing linked on your site
    • password will apply a password that you choose
    • public will appear in the navigation of your site
  6. when you are ready select publish.

Enjoy your new site.For visual people there is a screencast of this process available at www.accardophotography.com/upload/client/web/creating_inserting_wpsv_gallery.m4v